SSH Into Raspberry Pi: A Beginner's Guide
Need to access your Raspberry Pi from across the room, or even across the world? Secure Shell (SSH) is the key to unlocking remote access, allowing you to control your device seamlessly, and it all starts with knowing your Pi's IP address.
The ability to remotely manage a Raspberry Pi opens up a world of possibilities. Imagine being able to troubleshoot, update software, or even run complex applications from the comfort of your primary workstation, regardless of the Pi's physical location. SSH provides the secure foundation for this remote control, allowing you to interact with the Pi's command line as if you were sitting right in front of it. This guide will walk you through the essential steps to enable SSH, connect to your Raspberry Pi, and perform some basic tasks. Whether you're using Linux, macOS, or another operating system with SSH capabilities, the process is surprisingly straightforward. Remember, the first hurdle is always knowing your Raspberry Pi's IP address. If you have a display connected to your Pi, finding this information is easy; if not, we'll explore methods for discovering it remotely.
Heres a breakdown of the core concepts and procedures:
| Topic | Details |
|---|---|
| What is SSH? | Secure Shell (SSH) is a cryptographic network protocol operating on the client-server model. It provides a secure channel over an unsecured network in a client-server architecture. The protocol is widely used for remote login to a computer system, for secure shell services. It allows remote command-line access, enabling you to control the device remotely. SSH ensures secure access through encryption, protecting your data and commands. |
| Why Use SSH? | SSH is a powerful tool for remote management, enabling you to troubleshoot issues, run commands, transfer files, and manage your device securely and efficiently. Its applications are diverse, from software updates to file transfers. It is particularly handy when your Raspberry Pi is running headless (without a monitor or keyboard). SSH is a secure method of accessing and managing a Raspberry Pi remotely, allowing you to control the device, run commands, and transfer files seamlessly over a network. |
| Prerequisites | A Raspberry Pi, a compatible power supply, and a proper SSH client. The SSH server is built into the operating system (Raspberry Pi OS). Any device capable of running an SSH client can connect to it. |
| Enabling SSH | On Raspberry Pi OS Desktop: Enable SSH in the Raspberry Pi configuration tool under the "Interfaces" tab. On Raspberry Pi OS Lite: Apply advanced options when flashing the SD card. By default, SSH is disabled on Raspberry Pi OS for security reasons. Once SSH is enabled, you will be able to access your Raspberry Pi remotely. |
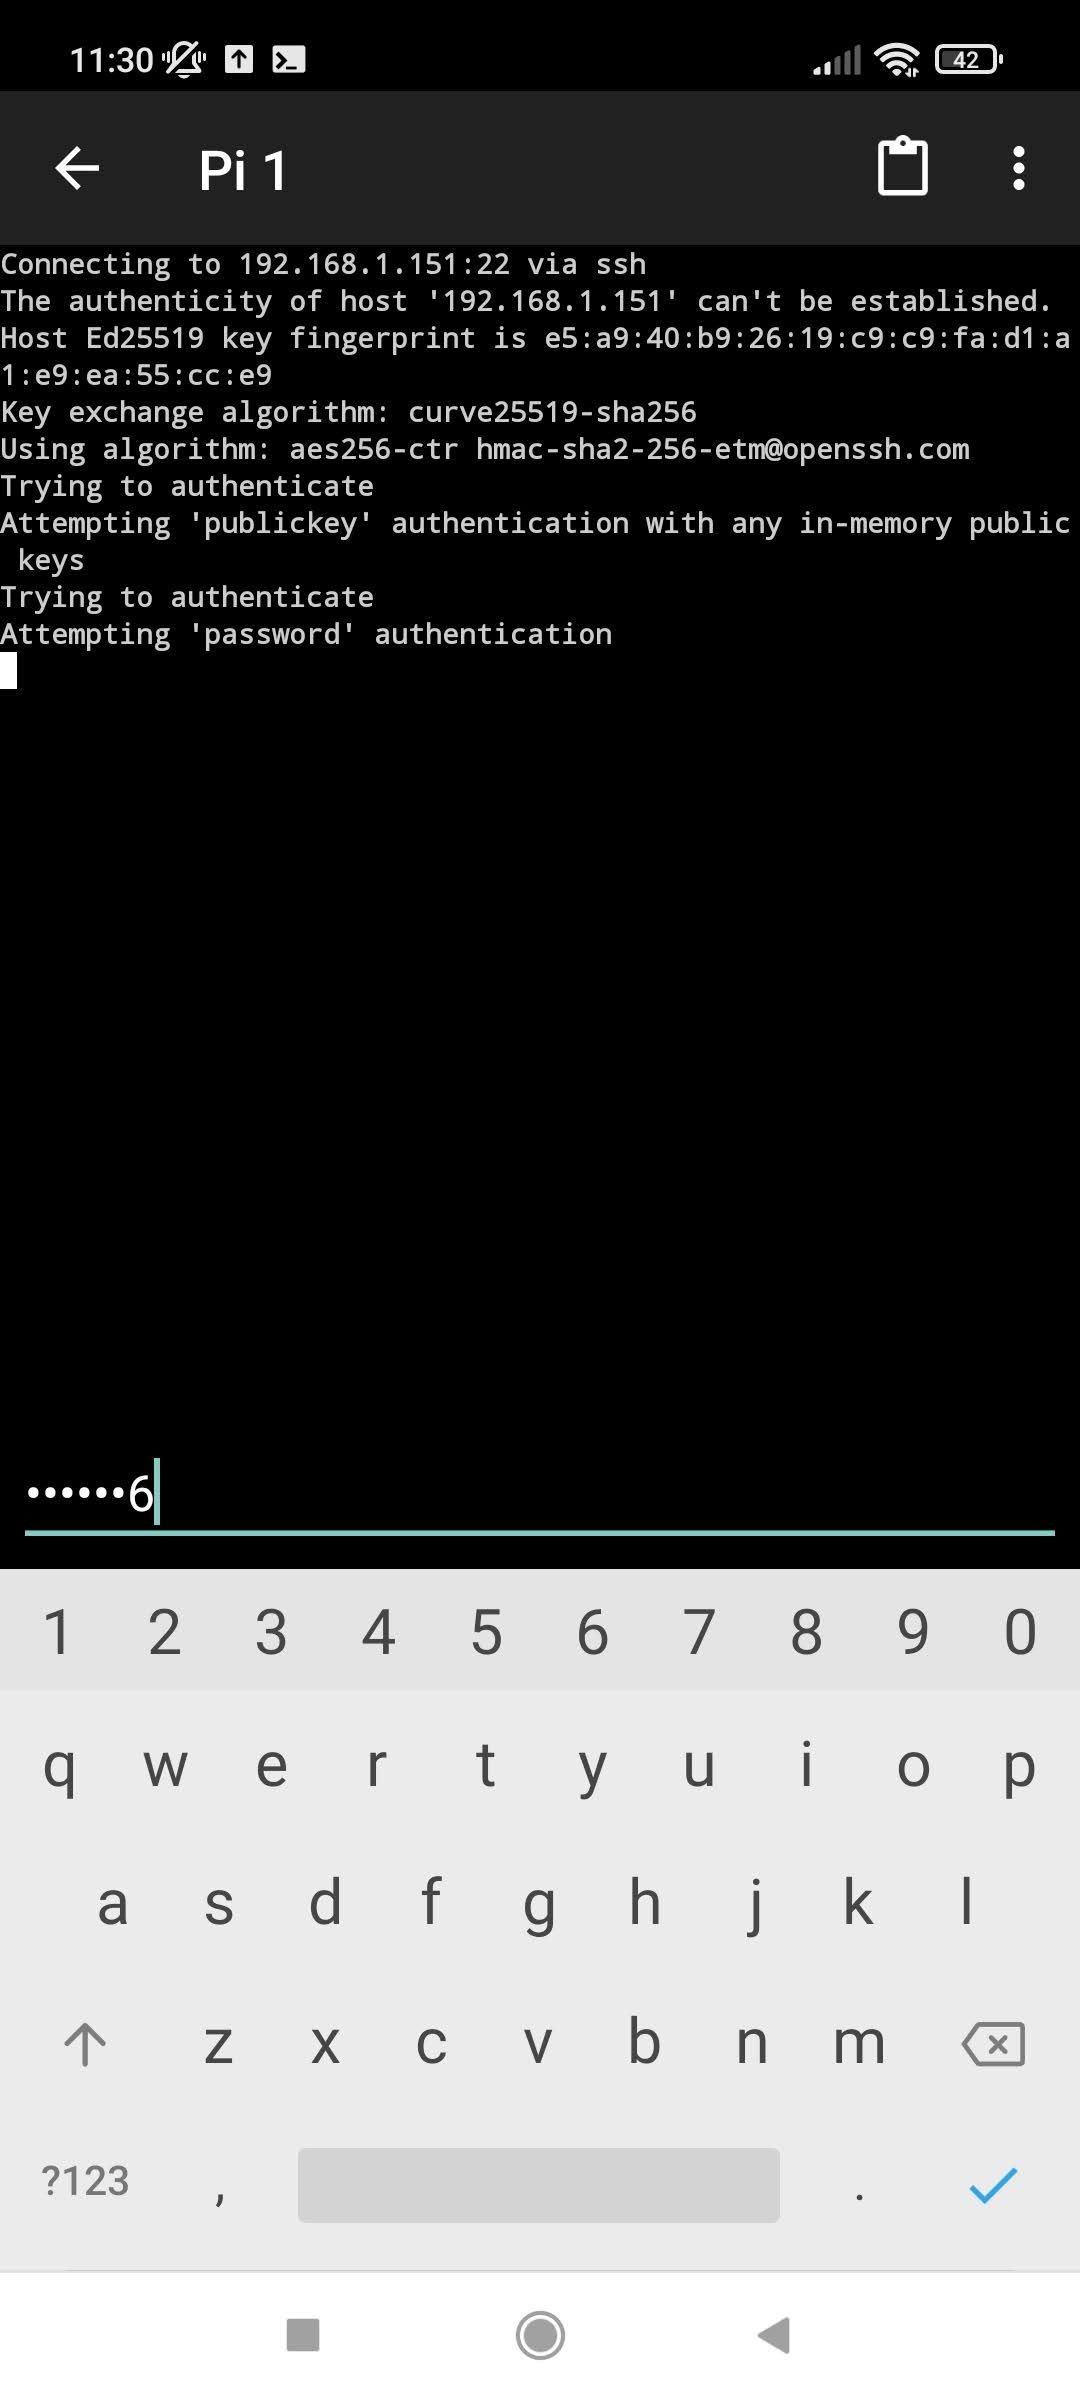
| Connecting to Your Raspberry Pi | Open a terminal window on your computer and enter the command: `ssh pi@`. Replace `` with your Raspberry Pi's IP address. You can find the IP address by entering the command `ifconfig` on the Raspberry Pi terminal. You may encounter a security warning regarding the authenticity of the host; type `yes` to continue. Enter your Raspberry Pi's credentials when prompted. |
| Finding Your IP Address | If you have a display connected to your Raspberry Pi, simply check the network settings. If not, you can use your routers interface, or on the Raspberry Pi terminal use: `ifconfig`. Alternatively, if mDNS is working, you can use the hostname. |
| Security Best Practices | Prioritize security by using strong passwords and SSH keys. Consider using SSH keys for passwordless authentication. Keep your Raspberry Pi's software up-to-date. Be mindful of the network you are connecting to, and avoid connecting to untrusted networks. |
| Common Use Cases | Remote file transfer (using `scp` or `sftp`), remote command execution, software updates and installations, and general system administration. Run a Minecraft server or other network services. Setting up remote development environments. |
| Troubleshooting | Verify your network connection. Ensure SSH is enabled. Check your firewall settings. Try pinging your Raspberry Pi's IP address. Double-check your username and password. |
| Tools | FileZilla and WinSCP are popular sftp clients. Putty is a popular SSH client for Windows. |
| Limitations | Remote SSH needs a Raspberry Pi 3 or 4. It is not supported on older Raspberry Pis, or on Raspberry Pi Zero. |
Reference: Raspberry Pi Documentation
Before diving into the specifics, let's clarify a few core concepts. SSH, or Secure Shell, is a protocol that enables secure remote access to a device's command line. Think of it as a secure tunnel through which you can send commands, run programs, and transfer files, all protected by encryption. The Raspberry Pi, running an operating system like Raspberry Pi OS (formerly Raspbian), acts as the SSH server. Your computer, phone, or any other device with an SSH client becomes the access point. SSH is a secure network protocol and using strong passwords is one of the primary methods to secure your network.
The first step, regardless of your operating system, is to find your Raspberry Pi's IP address. If you have a monitor and keyboard connected to your Pi, this is usually straightforward; you can view the IP address directly in the network settings. However, if your Pi is "headless" operating without a connected display you'll need to find it another way. You can often find it by logging into your router's administration interface and checking the connected devices. Alternatively, on the Raspberry Pi itself, you can use the `ifconfig` command in the terminal to display network configuration, including the IP address.
Once you have the IP address, the next step is to use an SSH client. On Linux and macOS, this is built-in: open a terminal and type `ssh pi@`. Replace `` with the actual IP address you discovered. For example, if your Pi's IP address is 192.168.1.100, you would type `ssh pi@192.168.1.100`. The first time you connect, you may be prompted to verify the authenticity of the host; type `yes` to accept the connection. You will then be prompted for the password for the `pi` user (or whatever username you have set up). Enter the password, and you should be logged in to your Raspberry Pi's command line.
To facilitate SSH access, you must first enable it on your Raspberry Pi. By default, for security reasons, SSH is disabled. On the Raspberry Pi OS Desktop, this is easily done in the Raspberry Pi Configuration tool, accessible through the main menu. Navigate to the "Interfaces" tab and ensure SSH is enabled. If you're using Raspberry Pi OS Lite (a command-line only version), you can enable SSH during the initial SD card flashing process by setting advanced options. When prompted, enter the password for the pi user (default is raspberry). You may encounter a security warning regarding the authenticity of the host; type yes to continue and add the raspberry pi to known hosts. Once the credentials are accepted, you should see the Raspberry Pi command line indicating you are now connected.
Accessing your Raspberry Pi remotely using SSH is a powerful way to manage your device securely and efficiently. By following these steps, you can enable SSH, connect to your Raspberry Pi from any operating system, and troubleshoot common issues. It is a secure protocol that enables remote access to your Raspberry Pi's command line, allowing you to control the device, run commands, and transfer files seamlessly over a network. Remember to prioritize security by using strong passwords and SSH keys.
For Windows users, you'll need an SSH client. PuTTY is a popular, free option. Download and install it, then enter your Raspberry Pi's IP address in the "Host Name (or IP address)" field. Click "Open" to connect. You'll be prompted for your username and password, just like with Linux or macOS.
Now that you're connected via SSH, you can perform a variety of tasks. You can run commands to update software (e.g., `sudo apt update && sudo apt upgrade`), manage files, and configure system settings. You can even transfer files between your computer and the Raspberry Pi using tools like `scp` (secure copy) in the command line, or graphical SFTP clients like FileZilla or WinSCP.
Setting up remote development on a Raspberry Pi is a useful application of SSH. To set up remote development, your Raspberry Pi needs to be connected to your network either by ethernet or wifi, and have SSH enabled. You can use SSH to securely access the command line, transfer files, and run code remotely. When you're ready, use the ssh command with your pi's username and ip address: `ssh pi@192.168.1.100` (replace with your pi's actual IP address). If mdns is working, you can use the hostname.
Here are some additional tips and considerations:
- Security First: Always use strong, unique passwords. Consider setting up SSH keys for even greater security and convenience.
- Firewall Rules: Make sure your firewall is configured to allow SSH traffic (port 22 by default).
- Dynamic DNS: If your IP address changes frequently (common with home internet connections), consider using a dynamic DNS service so you can always connect to your Pi using a consistent domain name.
- File Transfer: To copy a file named `myfile.txt` from your personal computer to a user's home folder on your Raspberry Pi, run the following command from the directory containing `myfile.txt`, replacing the placeholder with the username you use to log in to your Raspberry Pi and the placeholder with your Raspberry Pi's IP address: `scp myfile.txt pi@:/home/pi/`.
- Troubleshooting: If you can't connect, double-check the IP address, ensure SSH is enabled on the Pi, and verify that your network allows traffic on port 22 (or the port you've configured for SSH).
Beyond basic remote access, SSH opens doors to advanced applications. You can use it to run a Minecraft server, set up a web server, or even create a smart home hub. By enabling SSH, connecting to the Raspberry Pi, and managing the device remotely, you can effectively control your Raspberry Pi. This is particularly handy if your pi is running headless (without a monitor or keyboard) and you can access the raspberry pi command line in five distinct ways. Manage the SSH service through `systemctl` commands, ensuring it runs seamlessly. The ability to remotely manage a Raspberry Pi opens up a world of possibilities.
In essence, SSH is a fundamental tool for anyone working with a Raspberry Pi, offering a secure and efficient way to manage your device, regardless of your location. This article should have provided you with an essential understanding of the Raspberry Pi, the importance of remote access, and an overview of SSH. Once SSH is enabled, you will be able to access your Raspberry Pi remotely using an SSH client. Just make sure to write down the IP address you set here as it will be your IP address moving forward.


 is the key to unlocking remote access, allowing you to contr)