SSH To Raspberry Pi: Remote Access Guide & Setup Now!
Can you imagine wielding the power to control a tiny computer, nestled in a far-off corner of your home or even across the globe, with nothing but your laptop and a few keystrokes? The answer, surprisingly, is a resounding yes, and the key to unlocking this digital dominion lies in a technology called Secure Shell, or SSH.
SSH is more than just a protocol; it's a gateway. It's a secure tunnel that allows you to remotely access and manage devices like the Raspberry Pi, a credit-card-sized computer that has revolutionized the world of hobbyists, educators, and tech enthusiasts. This guide will walk you through the fascinating world of SSH and how it can transform the way you interact with your Raspberry Pi, opening up a world of possibilities that were once confined to the realm of science fiction.
Before delving into the intricacies of setting up and using SSH, let's briefly introduce the key player: the Raspberry Pi. This diminutive device, born from the minds of the Raspberry Pi Foundation, is a testament to the power of affordable computing. It's a full-fledged computer, capable of running a variety of operating systems, including the popular Raspberry Pi OS (formerly known as Raspbian). Its versatility knows no bounds, capable of powering everything from home automation systems and media centers to sophisticated robotics projects and server applications.
The beauty of SSH lies in its ability to bypass the need for physical proximity. Imagine you've placed your Raspberry Pi in a hard-to-reach location, or perhaps you're working on a project that requires continuous access to the device from a distance. SSH bridges this gap, allowing you to remotely connect to your Raspberry Pi's command line interface (CLI) essentially, its brain from the comfort of your own computer. This opens up a world of convenience and control, making it easier than ever to manage, maintain, and develop on your Raspberry Pi.
Now, let's address how to set up SSH, and how to unleash its power on your Raspberry Pi:
The fundamental principle behind SSH lies in its ability to establish a secure connection between two machines, typically a client (your computer) and a server (your Raspberry Pi). This connection is encrypted, safeguarding your data from prying eyes. The protocol utilizes a combination of cryptographic techniques to ensure both authentication and confidentiality.
There are multiple avenues through which SSH can be enabled on your Raspberry Pi. These methods hinge on whether you are using a Raspberry Pi OS desktop environment or a "headless" setup, where the Pi operates without a connected display or keyboard, often running the Raspberry Pi OS Lite version.
If you're using the Raspberry Pi OS desktop, the process is remarkably straightforward. You can enable SSH through the Raspberry Pi configuration tool, often found in the main menu or through the terminal by typing the command `sudo raspi-config`. Within this tool, navigate to the "Interfaces" tab, and you'll find an option to enable SSH. Simply select it, and the service will be activated.
For those using the Raspberry Pi OS Lite, the process involves preparing the SD card before booting the Pi. When flashing the operating system onto the SD card using a tool like Raspberry Pi Imager, there are advanced options available. Here, you can pre-configure the Pi, including enabling SSH. You can also set up a wireless network connection, create a user account and set a static IP address. This allows you to connect remotely to your Raspberry Pi without needing to connect a monitor, keyboard, or mouse.
Before initiating an SSH connection, knowing your Raspberry Pi's IP address is essential. This is the digital address that identifies your Pi on your network. There are several ways to find this information.
If you have a display connected to your Raspberry Pi, you can use the terminal to discover the IP address. Simply open the terminal window and enter the command `ifconfig`. The output will display network interface information, including the IP address, which is typically listed under the "eth0" or "wlan0" sections, depending on whether you're using a wired or wireless connection.
If your Pi is headless, you'll need to find its IP address through other means. If your router's configuration page allows you to view connected devices, you can often identify the Raspberry Pi by its hostname (which defaults to "raspberrypi"). You could also use network scanning tools on your client machine to discover devices on your local network. Once you know the IP address, you're ready to connect.
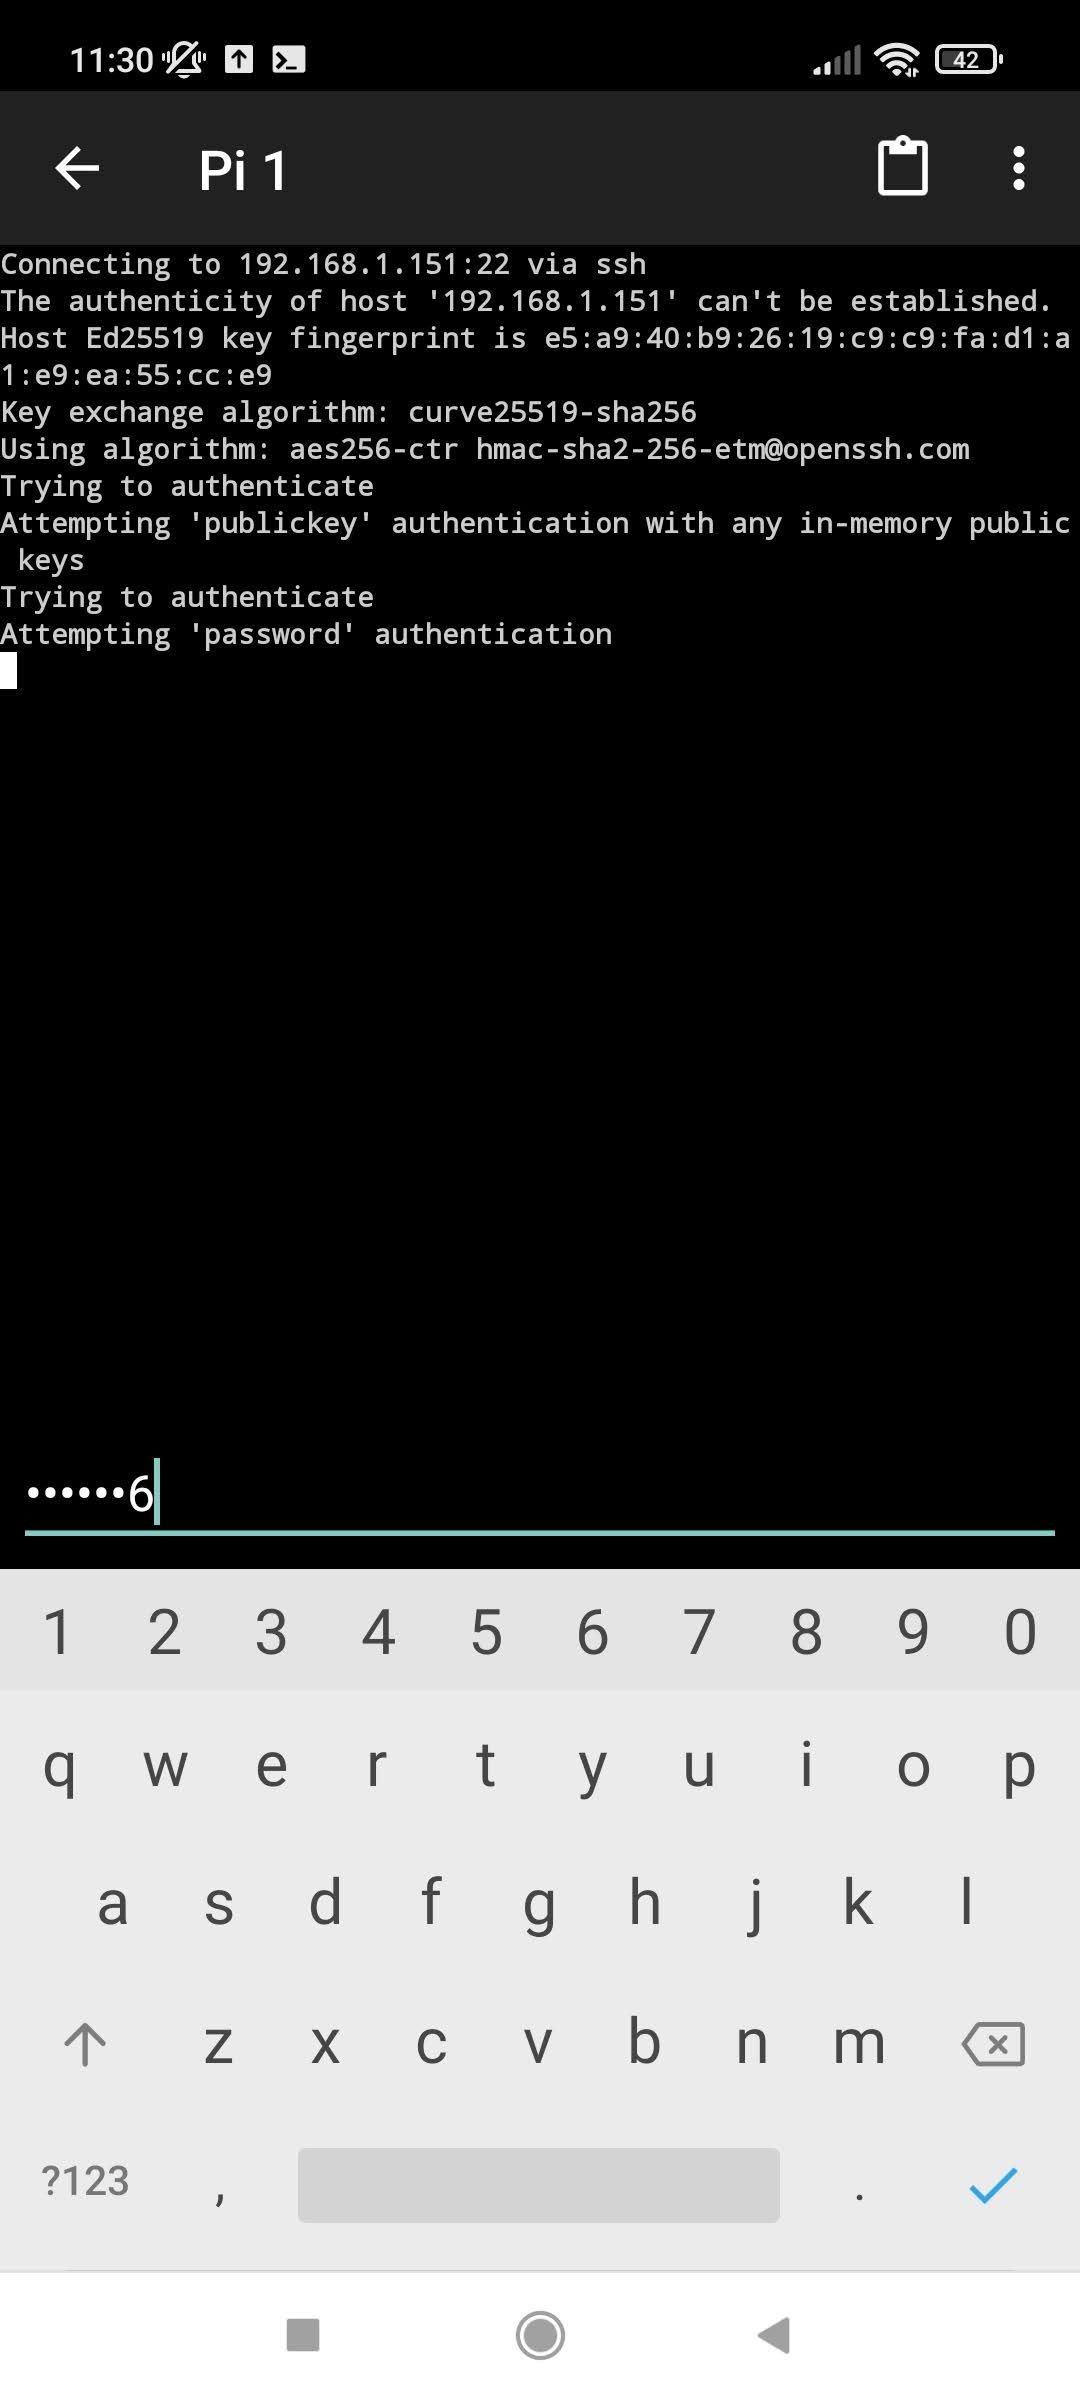
Now, it's time to put theory into practice and connect to your Raspberry Pi via SSH from another machine such as a laptop. Make sure both your Raspberry Pi and your client machine are connected to the same network. On your client machine, open a terminal window.
In the terminal, enter the following command: `ssh pi@`, replacing `` with the actual IP address of your Raspberry Pi (e.g., `ssh pi@192.168.1.100`).
The first time you connect, you may be prompted to accept the authenticity of the host. Type "yes" and press Enter. You will then be asked for the password for the "pi" user (the default user account). Enter the password, and you should be logged in to your Raspberry Pi's terminal.
If the login fails, double-check the IP address and password. Also, make sure SSH is enabled on your Raspberry Pi. Successful login grants you full access to the Pi's command line, enabling you to execute commands, manage files, and perform other operations as if you were sitting in front of the device.
For added security, and for access to your Raspberry Pi from outside your home network, you can setup the Raspberry Pi with a static IP address and enable remote SSH access. A static IP address will ensure the Pi's IP doesn't change, which can be problematic when connecting remotely. Be careful when allowing remote access. Make sure you understand how to configure your router and the security implications of such a setup.
Once connected, the possibilities are extensive. You can install software, configure settings, transfer files, and manage all aspects of your Raspberry Pi's operation from a distance. This is particularly useful for projects that are deployed in remote locations or those that require constant monitoring and adjustment.
File transfer is another significant advantage of SSH. You can seamlessly copy files between your client machine and your Raspberry Pi using commands such as `scp` (secure copy) or by using utilities like `sftp` (secure file transfer protocol). This eliminates the need for physical media transfer or the use of less secure file sharing methods.
The advantages of using SSH are numerous. It allows remote access, eliminating the need for physical presence and facilitating easy device management. It promotes convenience and versatility across a range of projects, including server operations, software development, and home automation. SSH also enhances security, as data transmission is encrypted. Furthermore, SSH enables efficient file transfer, making it effortless to manage and share files between devices.
One common use case for SSH is in the Internet of Things (IoT). Imagine a scenario where you have deployed a Raspberry Pi as a sensor node in a remote location. Using SSH, you can access the Pi, retrieve sensor data, and make adjustments to its configuration from anywhere in the world, provided you have a secure connection.
This is very valuable in home automation as well. Controlling smart home devices, monitoring security systems, and managing your home network all become easier through remote SSH access. SSH turns the Raspberry Pi into a versatile control hub for your entire smart home ecosystem.
For more advanced use cases, consider setting up SSH key-based authentication. This enhances security by eliminating the need to type in your password every time you connect. This is done by generating a public/private key pair on your client machine and then copying the public key to the Raspberry Pi. This method enhances your security even further. Follow the instructions on the screen to create a public/private key pair.
Furthermore, while there are a variety of options for connecting to your Pi remotely, one of those options would include using services such as SocketXP. These services typically provide secure tunnels, allowing you to expose your Raspberry Pi to the internet. Setting up SocketXP, or a similar service, often involves installing an agent on the Pi and then authenticating with the service. These services streamline the process of accessing your device remotely, simplifying network configuration and security considerations, especially for users without in-depth networking knowledge.
In a world of increasing connectivity, SSH has solidified its status as an invaluable tool for anyone working with Raspberry Pi and similar devices. By following these steps, you can harness the power of remote access, control your device from anywhere, and unleash your creativity and projects.


